
Creating folders in Hapax allows you to organize your files and manage access efficiently. This guide will walk you through the steps to create a new folder in the Information Vault.
Step 1) Log In and Access the Information Vault
Log in to your Hapax Account and navigate to the Information Vault located on the left side of your dashboard.

Step 2) Select Create New Folder
In the top right corner, select the Create New Folder button.

Step 3) Fill in the required fields
Complete the Folder Information fields.
Folder Location: Choose where you want the folder to be stored in the Information Vault. You can create inside an existing folder or a brand new folder.
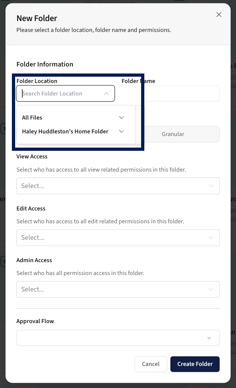
Folder Name: Fill in the name of the Folder
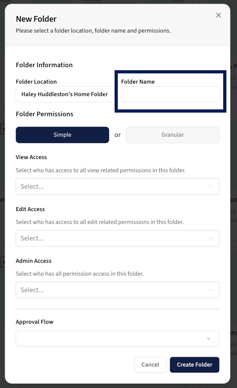
Select the folder permission type, either Simple or Granular. Below is an example of Granular.
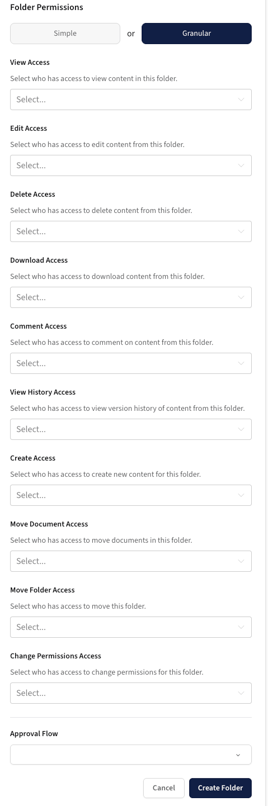
View Access: The ability to view the content in this folder.
Edit Access: Those who can edit the files within the folder.
Delete Access: The ability to delete content from this folder.
Download Access: Have the ability to download a file from this folder.
Comment Access: Has the ability to see comments and share thoughts on content in the folder.
View History Access: The ability to view the version history of the content within the folder.
Create Access: Has the ability to create new content for this folder.
Move Document Access: The ability to to move documents in this folder or out of it.
Move Folder Access: Has the ability to move the folder within the Information Vault.
Change Permissions Access: The ability to change permissions for this folder.
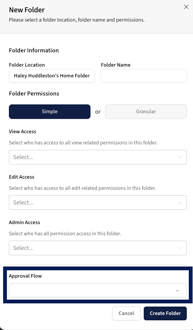
Walkthrough of Simple Permissions
View Access: You can choose by individual users, departments, teams, groups, or anyone can view. You can select multiple options at the same time (e.g, Branch Staff and Compliance)


Edit Access: You can assign by individual users, departments, teams, groups, or anyone can view.


Approval Flow: If the files within this folder need approval before going live, you can set up an approval workflow here. Define who needs to approve the changes before documents are finalized.
Step 4) Review for Accuracy
Review the folder details, access levels, and approval workflow. Once confirmed, click Create Folder to create the new folder.

Step 5) View Created Folder
Once your folder is created, it will appear in the location you selected within the Information Vault. You can now begin adding documents or organizing your files within the folder.

Done!
Creating a folder in Hapax is an essential step in organizing your documents and managing access effectively. By following the steps outlined in this guide, you can easily establish a new folder, set access levels, and implement an approval workflow if needed. This structure will help streamline collaboration and ensure that your files are organized and readily accessible.